How to Access a No Boot Hard Drive
This tutorial explains how to recover files from a laptop computer hard drives which no longer boot up. This is a power on/no boot situation where the user-account files are not password protected, ie; no sign-in password required. A virus may have corrupted the boot record, but all is not lost. Using a "host computer", and either a Drive Dock or a Drive Adapter, you can access and recover your files.
You'll Need:
* A Host computer (desktop or laptop).
* SATA/IDE-to-USB Drive Enclosure
You'll Need:
* A Host computer (desktop or laptop).
* SATA/IDE-to-USB Drive Enclosure
|
#ad #ad |
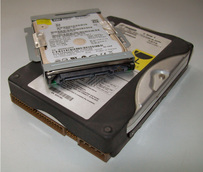
1. Remove the non-bootable drive. This requires locating the correct access panel on the underside of a laptop or the sides of a desktop computer. You may need to release a catch or remove several screws to release the drive. Carefully, remove the power/data cables or ribbon, so as not to damage pins.
2. Insert the no boot drive into a USB Drive Enclosure connected to a host computer. Allow the BIOS to detect the "new hardware" and install applicable drivers. 3. Run a thorough antivirus scan of the no boot drive, before attempting to access it! In fact, if your antivirus software has a boot-time scan, schedule it before rebooting with the non-bootable drive connected. A computer virus may have corrupted the original boot record and you do not want to damage another one! 4. Access the no boot drive. When your computer sees the drive, it will assign a drive letter. Open any folder showing your drive directory on the left to see the new drive , if your computer does not open it automatically. 5. Access your files on the no boot drive, by clicking on Users then on Admin or whatever your account name is. You will see the familiar directory tree showing your Documents, Downloads, Music and Photos. |
|
|
6. Copy or cut and paste your files from the non-bootable drive to your bootable drive or to another USB storage device. You could transfer entire libraries at once, instead of moving smaller blocks of files. USB port speeds of 2.0 or 3.0 are preferable, for faster transfer rate. 7. Use the Safely Remove Hardware (and eject media) wizard before disconnecting the USB Drive Adapter or Drive Docking Station via the icon in the notification area of the taskbar near the clock. Tips: * Desktop computers towers allow for two or more internal HD's, via data/power cables. * Wipe/Reformat the non-bootable drive, after you have recovered your files (see related articles). * Reprogram or save it as a secondary HDD. Windows 7+ automatically designates secondary HDD's as "slave." * Keep it in a SATA-to-USB drive enclosure, for removable storage/backup. Warnings: * Files in password protected accounts/files will not be accessible. * Unplug the power supply/remove the battery, before opening your computer. * Discharge static electricity by grounding yourself to the (metal) case. Copyright 03/06/2015 All Rights Reserved. Questions? Comments? Contact Me Related Articles: How to add a second HDD (a Slave drive) to your PC How to Securely Wipe a Hard Disk Drive |
|