How to Replace a Door Chime
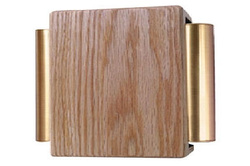
White oak, dual-toned, door chime
Replace a Door Chime as part of an interior decorating project, preference for a different tone or because of a faulty electromagnetic coil. Not a difficult task, just swapping out the existing hardware with the wiring already in place. Of course, you could always go wireless at this point!
|
Things You'll Need:
* Phillips or Flat tip Screw Driver * Needle Nosed Pliers * Electrical Tape or Heat Shrink Tubing |
|
|
1. Disconnect the power, safety first! Although low voltage, usually 12-24 volts, it can still shock you. Besides, sparks could ignite flammable material. Locate the electrical breaker panel. Often you will find the Transformer surface-mounted on the breaker panel itself. Not that unusual to find Transformers piggybacked onto another circuit with a 15 amp breaker. Remove the panel cover to trace the circuit. Once you have access, verify correct labeling of the breaker and turn the breaker off. Make note of the output voltage and amperage of the transformer, since the replacement Chime must be compatible.
2. Consider a few things when replacing a Door Chime. You will not only want the design to compliment the decor, you'll want an appropriate tone. Some Chimes only operate with a single button, while others may support two or even three and have a different tone for each. And, most importantly, the operating voltage must be compatible with the Transformer! Fortunately, you can buy a complete kit with a matching Transformer, which may also include a new button! 3. Carefully check the contents of your replacement door chime package. You may find that your new Chime came with a mounting bracket. In some cases, the Chime has a removable backing plate which attaches to the wall with screws. Securely mount your Chime to prevent it from vibrating loose, breaking the electrical connections and crashing to the floor. 4. Secure this wiring not typically anchored inside of the wall. To prevent them from slipping inside and out of reach, change one wire at a time from the old Chime to the new. This also makes it easier to correctly wire a Chime with multiple doorbell buttons. Insulate the connections with electrical tape or heat shrink tubing, to reduce the possibility of shorting out. Tips * Chimes are often shipped with rubber bands, cardboard, foam rubber or styrofoam packing material. Remove this before installation. * If you have wiring issues, or want to easily add an additional button, this is the ideal time to consider going wireless! Warnings * If the Transformer output is greater than required, the Chime could overheat, melt and catch fire! * If the Transformer output is less than required, the Chime may be barely audible if it sounds at all. Copyright 01/16/2009 All Rights Reserved. Questions? Comments? Contact Me Related Articles: Electrical DISCLAIMER: All of my Electrical tutorials are meant for those with working knowledge of electrical wiring and should not be attempted by first-time novices. |
#ad |