How to Disable sharing on Windows 7 and 8

Data Security
Minimize the possibility of unwanted access to your PC, laptop computer or tablet running Windows 7 or 8. For personal home-use, you might not want sharing active, unless you network with other home computers or devices. For business use, you may want to limit User access as a security measure. Unauthorized access can easily lead to theft of personal and corporate data. Constant-on connection such as DSL, Cable, Satellite, Fiber-Optic Broadband or Public Wifi access require constant monitoring and control. As Networking Software, Microsoft Windows allows shared access to Files/Folders and Printers by default. This tutorial details how to disable sharing for security measures.
Things You'll Need:
Microsoft Windows 7 or 8
Administrative access
Things You'll Need:
Microsoft Windows 7 or 8
Administrative access
|
1. Open Control Panel\All Control Panel Items\Network and Sharing Center\Advanced sharing settings. Under Home or Work and Public (current profile), tick radio buttons to “Turn off network discovery,” “Turn off file and printer sharing,” “Turn off Public folder sharing (people logged on to this computer can still access these folders),” Media streaming should be off, “Use 128-bit encryption …,” Turn on password protected sharing,” and “Allow Windows to manage homegroup connections.” Click Save changes to return to the previous window.
 Guest Account Off Guest Account Off
2. Open Control Panel\All Control Panel Items\User Accounts\Manage Accounts. Click on Guest Account to open then click Turn off the guest account. This returns you to the main account management window. If you have created other accounts, you can access and change them here.
See Tips. 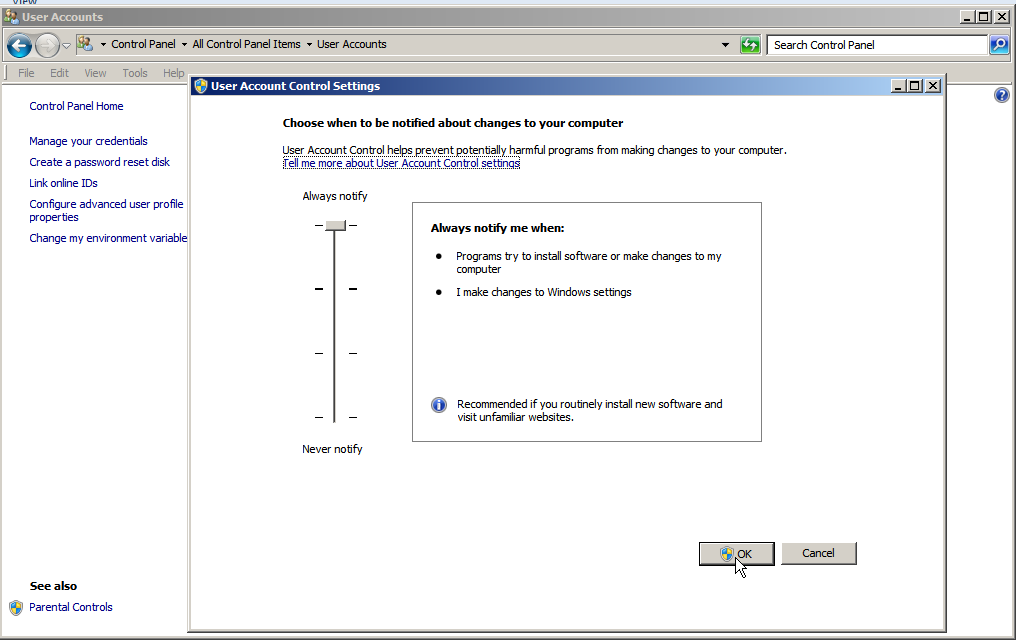 User Account Control Settings User Account Control Settings
3. Click on User Account Control Settings, in the main account management window. Set the slide bar to the highest setting, “Always notify.” This will alert you when programs try installing software or make changes to your computer. It also alerts you, as a precaution, to confirm that changes which appear to be made by you in fact are. Click OK and accept the User Account Control challenge.
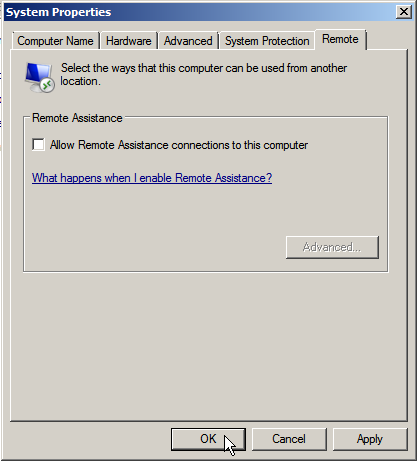 Remote Assistance Off Remote Assistance Off
4. Access System Properties to disable Windows Remote Desktop Assistance.
Having Remote Desktop Assistance enabled could allow malicious hackers to run code - without the users' knowledge or permission. From of the Start button on the Windows toolbar; type Run in the Start menu search bar, hit the Enter key, then type sysdm.cpl and hit the Enter key again. Accept the User Account Control challenge. Alternately, if you have a "My Computer" icon on your Windows desktop; right-click the icon, scroll down and click "Properties" and accept the User Account Control challenge. Then, click on the "Remote" tab and remove the check next to Allow Remote Assistance connections to this computer. Click on OK to apply and close the window. Tips:
* Disabling the default file/folder share will not prevent you from initiating peer to peer [per session] file shares. * Set Parental Controls, on accounts set up for minors, from the main account management window. * With “Always notify” set, your computer may seem paranoid or overly cautious by prompting you with User Account Control challenges. This is a good thing which I recommend getting use to. Warnings: * Do not disregard Microsoft's 'Patch Tuesday' Security Updates. * Many installed programs from Microsoft or a third-party, whether you actively use them or not, may have new vulnerabilities discovered by Hackers. Be sure to stay up to date! This article replaces "How to Disable Sharing, on Non-Networked PC's, using Powertoys for Windows XP"originally published 05/26/09 Copyright 03/15/2014 All Rights Reserved. Questions? Comments? Contact Me |
|