How to Repair Copper Pipes
Repair Copper Pipes
Do you have a burst copper pipe in an unheated space? Crushed flat from setting your appliance back too far? Noticed a leaking joint in existing plumbing? Relax, here's all you need to know:
|
Things You'll Need:
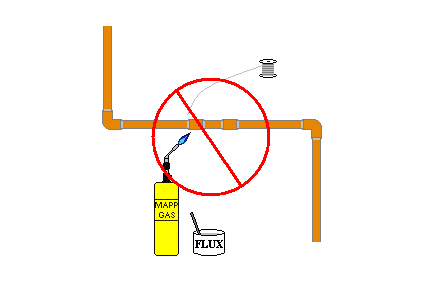
* Pipe Cutter w/ Reamer * Fine Grit Sandpaper or Crocus Cloth * Clean Cloth * Oatey Tinning Flux w/ Brush * Silver solder, or LEAD FREE Acid Core Solder * Propane or Mapp Gas Torch * The Ove-Glove or a good pair of Leather palm work gloves |
#ad |
#ad |
|
1. Replace the length of pipe as a whole, instead of cutting out and replacing a bad section. You will not only half the solder joints required, you will return it to original. More joints equal more possible failures, besides more possible ridges for mineral deposits to adhere to.
2. Use a pipe cutter if it makes it easier to remove the damaged length of pipe. Once you cut the pipe, use a torch to remove both sections. By all means, use a pipe cutter instead of a hacksaw to cut the replacement pipe to length. Prep the ends of the pipe, by sanding and cleaning with a rag. Don't forget to use a reamer, or a pocket knife blade, to remove the burr on the inside of the pipe caused by the pipe cutter. Roll the end of your rag up and insert it into the pipe ends to soak up any moisture. Apply Tinning Flux and assemble. 3. Use a knife blade to remove any excess solder, in order for the new pipe to fit. The inside of the fittings on either side of the pipe removed remain tinned and like new, having fresh copper under the solder. Dry-fit the joint, before applying flux, to check for fit. Then separate,flux and reassemble. When repairing a leaking joint, remove the original and replace it with a new one, remember to clean all mating surfaces with sandpaper and a clean rag. 4. Apply torch heat to the joint, passing the flame back and forth to spread the heat evenly. Once you reach melting temperature, remove the flame and apply your lead-free solder around the fitting to insure that it completely floods the joint. This is referred to as 'sweating the joint.' Tips * If you want to know how to make the best solder joint, read my article on the subject. I have included a link to it, below in the resource area. * Anything worth doing is worth doing right. Don't try to get by with a cheap plumbing repair, you'll end up getting soaked! * Twist a rag, insert it into both fittings to soak up and dry any water present. * An old plumbers trick is to shove a piece of bread into the pipe to hold back any residual moisture. Flush the bread out of the line, by opening the nearest hose bib or cold water valve at your utility sink or washing machine (remove the hose and drain into a bucket). * Water has a bad habit of cooling the copper internally and preventing the solder from flooding the entire joint. A wet joint will be a leaky joint... * If you are soldering a replacement valve, be sure to open it all the way. This not only helps to protect internal seals, it helps prevent back pressure which could blow the solder out of the joint. Warnings * It never pays to go the cheap route! Copyright 12/27/2008 All Rights Reserved. Questions? Comments? Contact Me |
|