How to Install Vinyl Outdoor Swings

Photo courtesy of PorchSwings.com
Install an attractive vinyl porch swing, so you can relax and enjoy that great view from your front porch! A porch swing, whether made of vinyl, metal or wood can add value to your property.
The following steps apply when hanging your swing on a front porch with accessible framing above a Vinyl ceiling:
The following steps apply when hanging your swing on a front porch with accessible framing above a Vinyl ceiling:
|
Things You'll Need:
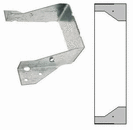
* 1- Vinyl or Wooden Porch Swing w/ Chain Set * 1- 4'x4"x4" * 1- Tape Measure * 1- Pencil * 4- SIMPSON Strong-Tie Double Shear Hanger Z-MAX * 24- #8-#10 x 1-5/8" Galv. Hex Head Screws (or square drive deck screws) * 8- 1/4" x 4" Galv. Lag Bolts * 2- 3/8" x 6" Galv. Forged Eye Bolts w/ 2 Flat Washers & 4 Nuts * 1- 3/8" electric or cordless Drill |
* 1- 1/8" Drill Bit * 1- 3/8" Drill Bit * 1- 1/4" Circular or Chop Saw, or Hand Saw * 1- MALCO 6.25" Vinyl Siding Removal Tool * 1- 6'-8' Step Ladder * 1- Narrow Cats Paw (Trim Nail Remover) * 1- Trim Hammer * 1- Pliers * Half a Dozen aluminum trim nails |
|
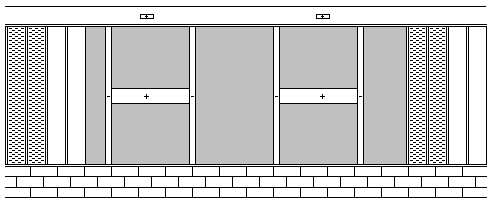
1. Decide where to center your Swing, keeping things like windows, doors, available ceiling space and landscaping obstructions in mind. You want an unobstructed view, while preserving the charm of your porch space. 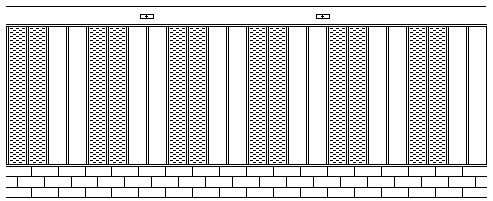 Mark location
2. Measure the width of your Swing (the distance between the chain attachment points). Transfer these measurements onto masking tape and apply it to the wall, fascia or soffit to mark the overhead location. (see spacing 1)
 Expose rafters
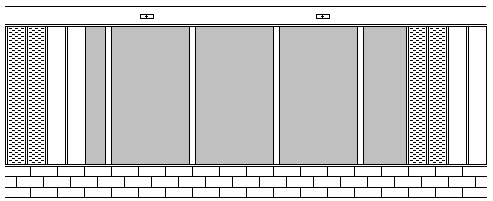
3. Remove an extra panel on either side of the swing's width, for easy access.
Using your trim hammer and cats paw, remove any trim nails holding the vinyl panels. Carefully, insert your vinyl siding removal tool into the seams and work the beads apart. Flex the panels to work them out of the C-channels. Set the panels against the wall in the order removed. 4. Measure the distance between the ceiling rafters and cut the 4x4 to fit snug but not too tight. You will need just enough room to add the mounting brackets on both ends.
 Simpson 4x4 Strong tie
5. Stand your 4x4's on end, on a flat surface, to insure that your brackets are flush. Attach the SIMPSON Strong-Tie Double Shear Hangers, using 2 of your #8-#10 x 1-5/8" galvanized hex head screws (or square drive deck screws) on each. (see 4x4 Strong Tie)
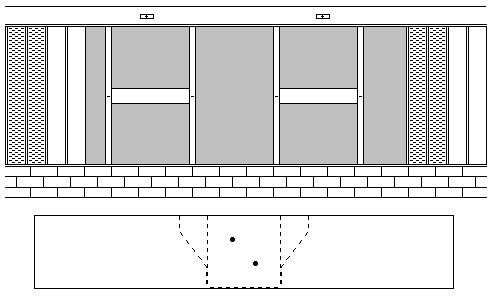
 Locate supports
6. Measuring out from the wall or in from the Fascia, mark the points you want the swing to hang from. Make these points even, unless you want to off-set your swing for the best view angle.
7. Slide your pre-mounted 4x4's in place, flush with the 2x lumber. Center them on the pencil marks, and attach them with the rest of the #8-#10 x 1-5/8" galvanized hex head screws (or square drive deck screws).
 Lag bolt reinforcement
8. Drill two off-set pilot holes through the 2x lumber into the ends of the 4x4's, using an 1/8" bit, and install the 1/4" x 4" lag bolts.
 Mark 4x4's
9. Transfer your width measurement to the 4x4's. You can drive a trim nail half way in, to locate this mark after you've re-installed panels in the next step. Be careful not to cut yourself on this, as you work. And, remove them, before you drill for the Eye Bolts. (see Spacing 5)
 Reinstall & drill
10. Reinstall the panels, from the outside in. Once you have covered the trim nail, apply pressure to dimple the panel. Remove the nail. Carefully align your Drill and 3/8" bit and drill up through the panel and 4x4.
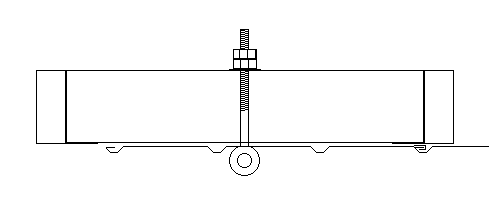 Eye bolt
11. Install the eye bolts. Double-nut and tighten, to prevent the eye bolts from backing out.
12. Re-install the remaining panels and hang your new Swing with the chain set provided. No chain set? Most home centers sell chain and chain hardware in bulk.
Tips * If you have a finished ceiling, with no crawl space access, locate the center of the 2x rafters with a stud finder. Pre-drill and use heavy duty steel screw hooks. Keep in mind that this method has a lower maximum weight limit. Warnings * Although the lumber and hardware in this set of instructions can support up to 800 pounds, the Swing and chain assembly has it's own weight limits not to be exceeded. * If the distance between the wall and fascia exceeds 6', double the 2x4 studs for added strength. Copyright 12/12/2008 All Rights Reserved. Questions? Comments? Contact Me Related Articles: Exterior |
|