How to Replace a Water Heater Thermocouple

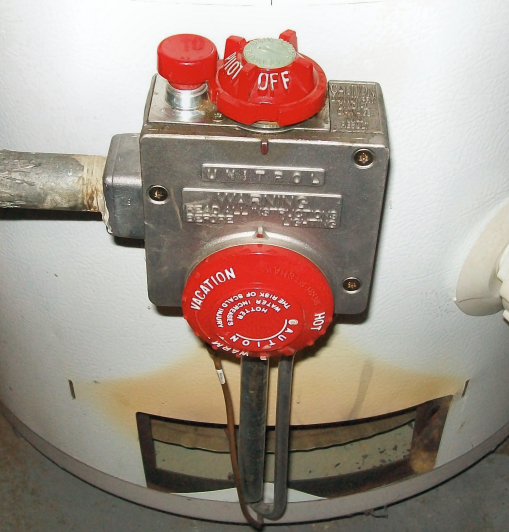
Universal Thermocouple
Replacing a gas water heater thermocouple requires a few hand tools and a little bit of knowledge. The thermocouple keeps the pilot lit and consists of a thin chamber at the end of a capillary tube. One end heated by the pilot flame forces a tiny amount of trapped/expanding air into a release valve in the gas valve assembly which allows the flow of gas to the pilot and the burn chamber. Pushing the button when lighting the pilot bypasses the release valve, temporarily, allowing gas to the pilot. The pilot light flame heat on the thermocouple keeps the release valve open. If the capillary tube fails, the pilot will go out when the button is released. This being the most common cause, a faulty gas valve assembly may also prevent the pilot from remaining lit. Considering that a 36" Thermocouple only costs about $13.00 (Home Depot), and much easier to replace than the more costly gas valve assembly, it is worth taking the chance and replacing it.
|
You'll Need:
* 24" or 36" Universal Thermocouple * Off-set phillips screw driver * Needle-nose pliers * 3/8" & 7/16" open end or line wrenches |
|
 Preparation Preparation
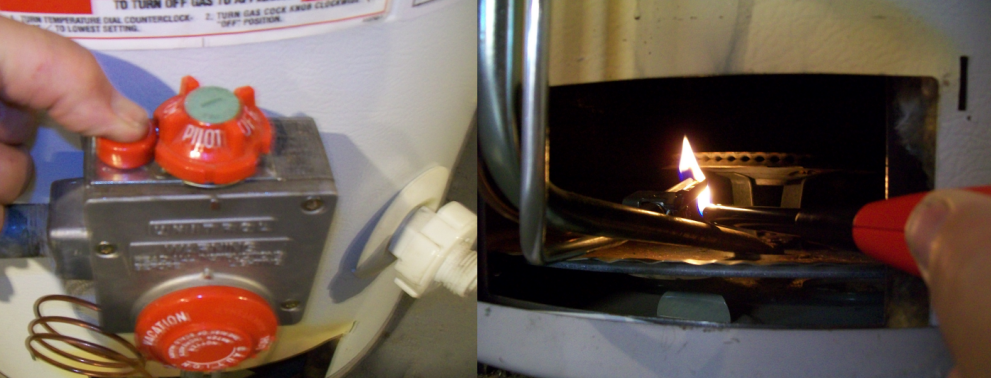
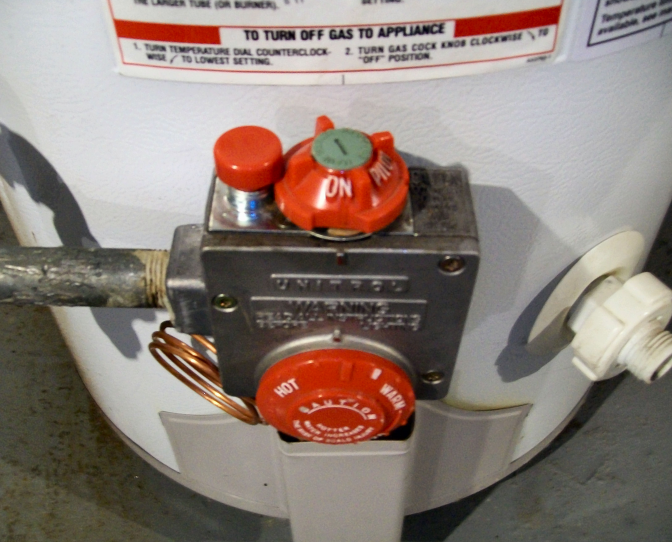
1. Turn gas off by turning the control valve, on top of the gas valve assembly, to the OFF position. And, turn the thermostat control wheel counter-clockwise to the lowest setting. Remove the heat shields.
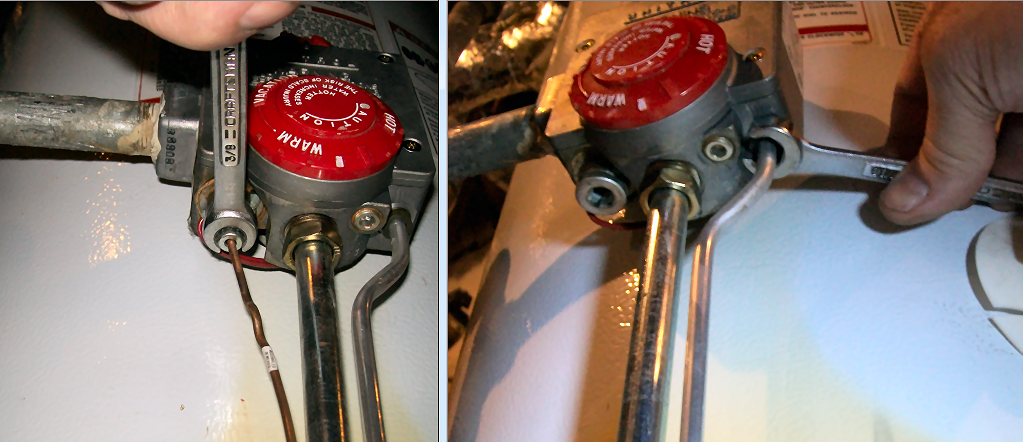 Line removal Line removal
2. Unscrew both the thermocouple (capillary tube) and the pilot lines from the gas valve assembly. Carefully, remove the lines to avoid thread damage.
 Separate brackets Separate brackets
3. Remove the phillips screw, at the bracket, holding these two lines to the main burner line in the lower portion of the water heater. Separate the two halves and remove the thermocouple and pilot lines from the water heater.
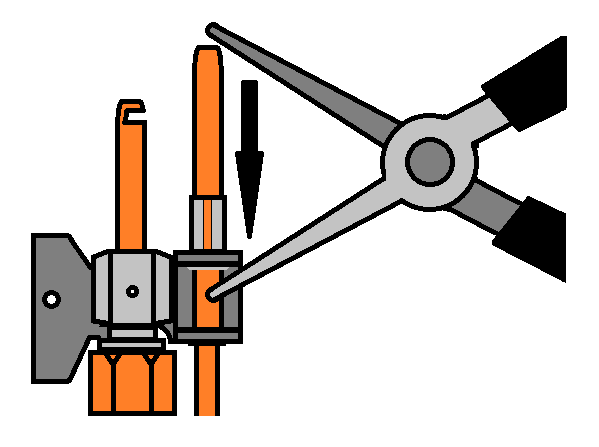 Remove Thermocouple Remove Thermocouple
4. Force the thermocouple chamber down and out of the friction clamp, using needle-nose pliers. Remove this friction clamp and replace it with the new one provided. Carefully, slide the new thermocouple chamber through the friction clamp until it bottoms out in the bracket.
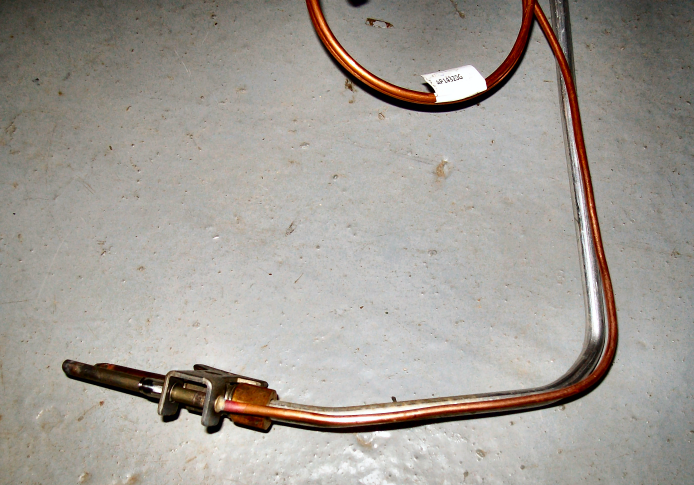 Bend capillary tube Bend capillary tube
5. Unwind the new capillary tube and gently bend it to conform to the curve of the pilot line, avoiding any sharp bends which might crimp the line and render it useless. These lines must remain close together to clear the internal heat shield.
6. Insert both lines into the lower portion of the water heater, lining up the clamp halves, and secure both in place with the phillips screw. Insert the compression end of each line into their prospective ports in the gas control valve. Carefully thread the compression nuts by hand to avoid cross threading. Tighten each compression nut one-quarter turn beyond finger tight. Nuts should feel snug when properly tightened.
 Relighting the Pilot Relighting the Pilot
7. Relight the pilot by turning the control valve from OFF to PILOT, lining up the button with the cut out on the knob. Press and hold the button down while touching flame to the pilot opening next to the thermocouple chamber. Continue to hold the button down for 1 minute, before releasing. The pilot flame should now remain lit.
 Set Controls Set Controls
8. Re-install both heat shields. Turn the control valve to ON and rotate the thermostat control wheel to the desired setting. You will hear the gas burner ignite with a whoosh.
Tips:
* If in doubt which length you need, go long! Coil up the extra capillary tube. * Use an extended lighter to relight the pilot * This very same Universal Thermocouple replaces those used in Gas Furnaces and Gas Logs too! Warnings: * Avoid sharp bends when forming or coiling the capillary tube. * Failure to re-install the heat shields before turning up the thermostat may result in singed fingers! * If you smell gas, turn everything off immediately and recheck the pilot line connection. Copyright 7/29/2013 Questions? Comments? Contact Me Related Articles: Plumbing |
|