How to Install a vented Glass Block window
Vented Glass Block Window
Improve the looks of your property, increase privacy and security by replacing that old, ugly, drafty single-pane basement window with Glass Block.
|
Things You’ll Need: * Tape measure * Wonder bar * Sawzall * Stiff brush * Concrete bucket trowel & joint slicker * 60 lb. bag Quikrete® Mortar Mix * 1 qt. Quikrete® Bonding Adhesive * Water & rags for clean up * Small mud pan or bucket |
|
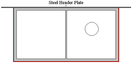 Rough Opening Rough Opening
1. Measure the rough opening. Allow for a ½” gap on either side and below the replacement window. Use concrete mortar mix to anchor and secure the new Glass Block window in place. The top of the Glass Block should fit flush up against the header in the window opening.
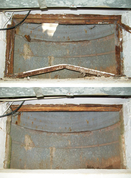 Demolition Demolition
2. Remove the existing window. In this example, the old window is hinged and mounted in a steel frame. After scraping out any caulk, and removing the window unit from the frame hinges, insert a Wonder bar under the lower frame and pry upwards. This causes the sides to draw inwards away from the concrete channel anchoring the frame in place. Now, using a sawzall, cut through the steel frame. Repeating the process on the upper section allows for removal.
3. Clean the opening of all loose material, concrete dust, rust, dirt and gravel. Determine the placement of the new Glass Block window. This particular unit measures 3-1/8” thick. Measuring from a straight edge, mark the inside location for new window. Allow for a ledge of several inches, on the outside, since the fresh concrete tapers away from the window.
 Window Preparation
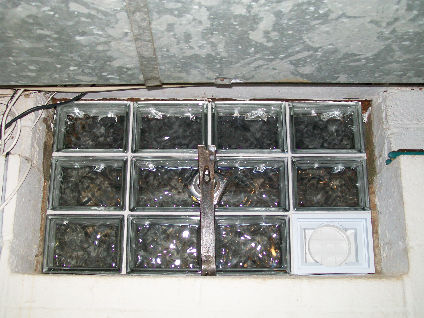
4. Apply a generous bead of silicon caulk along the top/outer edge of the Glass Block unit, before carefully setting it in place. Inserting the Wonder bar under the center of the window, pry gently upwards to cantilever the unit flush against the header. Wedge your tape measure, or a block of wood, between the Wonder bar and the glass to hold the unit snugly in place. Align the unit with the marks you previously made and center it in the opening. Smooth the caulk along the outer edge, along the top, and apply a bead to the inner edge to seal the Glass Block to the header.
5. Mix concrete mortar and bonding adhesive (2 to 1) into a small mud pan or bucket. This stiff slurry should stay in place between the Glass Block unit and the surrounding concrete or block wall. Working from both directions (help required), pack the mortar mix into the voids on either side and below the unit. Use a narrow joint slicker to force the slurry into the gaps, removing all air pockets.
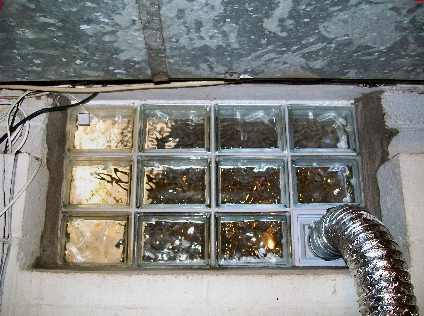
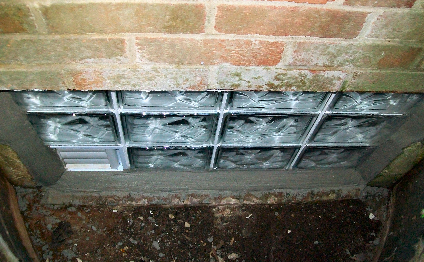 Finished Glass Block
6. Cover approximately ½” of the Glass Block and taper the mortar away, using a bucket trowel. This provides a nice appearance and allows for water runoff. Finish the concrete with a stiff brush to remove any trowel lines. Clean mortar mix from the glass with a damp towel.
7. Remove the Wonder bar, after the mortar mix has cured. Mix just enough mortar and bonding adhesive to fill the remaining void. Apply using the joint slicker to fill this narrow gap.
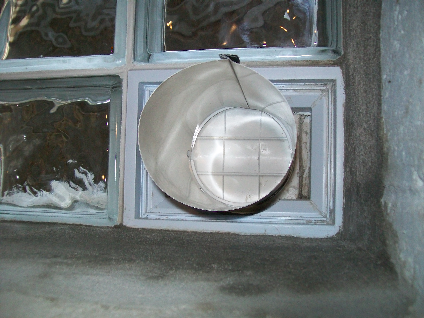 Dryer vent tube
8. Roll the sheet metal dryer vent tube into shape and lock the seams together. Insert the tube into receiving end of the vent, locking it into the tabs. Slip the flexible dryer vent hose onto the tube and secure it with a clamp. Secure the other end to the dryer and slide the unit into place.
Tips
* When setting your new vented Glass Block window, be sure the louvers open outward. * Don’t forget to reattach the glass break sensor, if the original window had one. * Apply a concrete sealer, stain or paint if desired, once the mortar has cured. * Apply a little caulk around any ground, telephone wire or cable passing through the mortar, as a precaution. Warnings * Although Glass Block windows do offer security, they are not 100% “burglar proof.” They just take a lot longer to break through than other options. Copyright 08/28/2011 All Rights Reserved. Questions? Comments? Contact Me Related Articles: Concrete |
|