How to Replace a Dell Vostro 2510 LCD Screen
There are a number of reasons for replacing an LCD screen, including dead pixels and physical screen damage. As this tutorial demonstrates, replacing an LCD screen is not a complicated process. This procedure takes less an hour to complete.
You'll Need
* #2 Phillips screwdriver
You'll Need
* #2 Phillips screwdriver
 Bezel Screws Bezel Screws
1. Remove the six screws around the perimeter of the screen bezel. Raise an edge and work your way around the LCD screen, lifting with your fingers, careful not to bend the plastic sharply or cut yourself on an edge.
2. Remove the two screws attaching the bottom of the frame rails to the lid and lay the lid down on the table while supporting the base.
 Rail Screws Rail Screws
3. Raise and support the LCD screen while removing the (8) screws holding the screen to the frame rails on both sides.
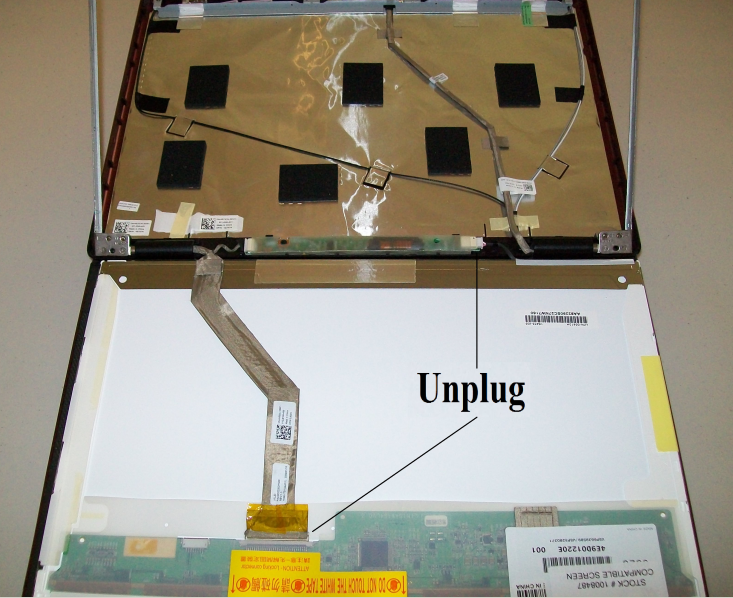 LCD Screen Connections LCD Screen Connections
4. Once the LCD screen is removed, unplug the 2-leader (pink/white) connector from the LCD Inverter, cut the tape and unplug the ribbon cable. Reverse these steps to install the replacement LCD screen.
Tips:
* The difference between the 1510 and the 2510 is the color (1510 is black, 2510 is cherry red) * No picture could mean a bad LCD Inverter or backlight bulb costing a fraction of what a monitor costs. Warnings: * Do not touch the white tape along the top edge of the new screen. * Secure the locking connector with a new piece of tape. Copyright 07/21/2014 All Rights Reserved. Questions? Comments? Contact Me |
|