How to Replace Rear Leaf Springs
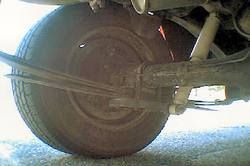
Rear leaf springs
Whether your Leaf Springs are sprung or you just want to upgrade your suspension, replacing them is a fairly straightforward process. This job can be done in the driveway in a couple of hours. Even faster with the use of power tools! Obviously, differences between Makes and Model years, foreign and domestics, cars and trucks will have some affect on the steps as outlined in this tutorial. This article describes replacing the rear leaf springs of a 1994 Nissan Std. Pickup Truck. Even so, these steps should prove universal for most rear wheel drive vehicles.
|
Things You'll Need:
* Hydraulic floor Jack * Jack Stands * Wheel Chocks * Metric or Standard Wrenches & Impact Sockets * Lug Wrench or Impact Wrench * Pry Bar * 16 oz. Ball Peen Hammer * Replacement Leaf Spring Packs * Install Kit (eye bolts, u-bolts, shackles and rubber or polyurethane bushings) * Drop Cloth |
#ad |
|
1. Purchase all necessary tools and parts ahead of time, especially when working on your only vehicle, to avoid the necessity of reinstalling old parts so that you can drive to the auto parts store. This means having the right tools, springs and install kit (eye bolts, u-bolts, spring shackles and rubber bushings) before you begin.
2. Chock a front wheel, to prevent forward and backward movement. Using a Lug wrench, loosen the lugs of both rear wheels. Safer to remove the rear wheels to gain access than to crawl under the vehicle. Even with jack Stands, accidents can happen! 3. Remove the leaf springs as follows. Roll the Hydraulic floor Jack up underneath the Differential. Rotate and center the plate so the tabs won't damage the cover. Raise the rear end until both tires clear the floor. Do not raise up too high, since a steep angle can cause Jack Stands to kick out. Place Jack Stands under the frame rails, just ahead of both forward spring mounts. Slowly, lower the rear end down until the frame settles onto the Jack Stands with the tires off of the ground. Leave the floor Jack under the Differential. Before removing the tires, rock the vehicle to insure that the Jack Stands are properly placed and the vehicle is stable. 4. Remove the lock nuts and washers from the Shock Absorbers lower mounting stud welded to the base plate below the spring pack. After rotating the shocks out of the way, remove the U-bolt's nuts and washers. Release any spring pressure against the base plate by easing the rear end down slightly. 5. Raise the rear end, once the base plate is removed, until the axle tube separates from the leaf spring pack. You may need to pry the spring pack off of the centering pin. 6. Remove the through bolt from the forward spring mount. Hold the spring, as you pry the knuckle out from the mounting flanges, careful not to pry against the Jack Stands. Lay the front of the spring on the ground and move to the rear. Remove the nuts, washers and outer plate. Slide the spring off of the shackle pin and set it out of the way. Drive the shackle and rubber or polyurethane bushing out of the tube welded to the frame.  Leaf spring installation kit Leaf spring installation kit
7. Install the replacements. Take the shackles, bushings, and through bolts from the installation kit. The kit should include a packet of lithium grease. Only meant to help start the bushings into the spring knuckles, any other type of grease will damage the rubber or neoprene bushings. You should find two sizes of bushings. The larger ones fit the spring knuckles, the smaller fit the shackle (to the rear).
 Spring shackle Spring shackle
8. Insert the shackle bushing into the welded tube. Slide the hinge pin of the inner shackle plate through the steel sleeve of the bushing. Load the bushings into the leaf springs. Determine the orientation the of the spring pack, by comparing it with the original. You may find no difference, measuring from the center. In that case, it doesn't matter. But, if there is a difference, turning one forward and the other backward will cause the rear axle to 'dog leg,' and the vehicle won't track straight. This misalignment will cause premature tire wear. Slide the rear bushing & spring onto the shackle and attach the outer plate. Do not tighten the lock nuts yet.
9. Raise the front of the leaf spring, fit it between the forward mounts and slide the bolt through. Again, do not tighten the lock nut.
10. Slowly ease the rear end down until it contacts the spring. Align the center pin. Install the new U-bolts into the lower base plate. Now, tighten all the lock nuts to the Manufacturer's specified torque. Worth mentioning this here since it may apply to your vehicle. If you have pads or spacers for your leaf spring pack, sandwiched them into place during this process in the order which they were removed. 11. Reconnect the Shock Absorbers to the base plate, torquing to specs. Reinstall the tires but just snug the lug nuts. Raise the vehicle to remove the Jack Stands and set it down. Now, tighten the lug nuts in a star pattern. Don't forget to remove those wheel chocks! Happy Motoring! Tips * Mark the leaf springs as you remove them to help determine orientation. * Always replace the hardware, reusing old stressed steel is unsafe! * If you have room, stack the tires under the body of the vehicle as a precaution. * Now is the ideal opportunity to replace those old worn out Shock Absorbers! * New Leaf Springs and pneumatic Shocks will make your vehicle feel young again. Copyright 03/18/2009 All Rights Reserved. Questions? Comments? Contact Me Related Articles: Automotive |
|
#ad